

Introduction
AI developers using macOS or Windows can seamlessly connect to over 30 types of Salad GPU nodes via VS Code, enabling real-time testing and debugging in live environments — before moving to production. This gives them full access to GPU resources, environment variables, IMDS endpoints, and more. Developers can validate VRAM usage, network behavior, and external resource access; fine-tune application parameters such as local queue lengths, batch sizes, and thread counts; and catch rare, real-world edge cases that static testing often misses. There are several ways to enable VS Code remote development on SaladCloud. Tailscale can provide secure, direct network access between your developer laptop and Salad nodes, supporting both TCP and UDP-based applications. Using the Remote - SSH extension in VS Code Desktop, you can connect to a Salad node over its Tailscale IP, which launches a VS Code Server on the node. This allows you to easily open remote folders or clone GitHub repositories to begin development and testing directly on the node. This solution is simple to deploy, scales greatly, and is highly recommended. For more details on integrating Tailscale with workloads on SaladCloud, please refer to this guide.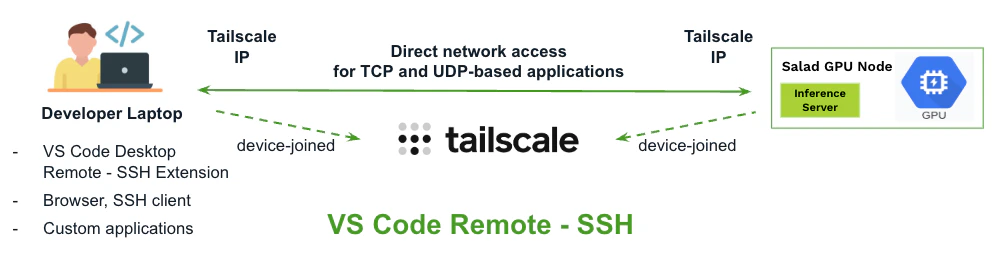
Solution Comparison and Use Cases
Microsoft Dev Tunnels
Dev Tunnels enable secure, authenticated connections over the Internet, allowing developers to expose local services — such as applications running on Salad nodes — to remote clients, including browsers and custom applications. Both clients and servers can remain behind firewalls and NATs; they only need to initiate outbound connections to Azure, which handles secure relaying, identity and management services. Each server requires a dedicated tunnel, which can be accessed by multiple clients. While tunnels are primarily for TCP connections, UDP-based protocols are also supported by Dev Tunnels. Currently in public preview and free to use, Dev Tunnels require either a GitHub or Microsoft account for access. Each account supports up to 10 tunnels, with each tunnel offering speeds of up to 20 MB/s and a total monthly data transfer limit of 5.0 GB per account. Please check the link for more details. Below is an illustration of how applications leverage Dev Tunnels on SaladCloud: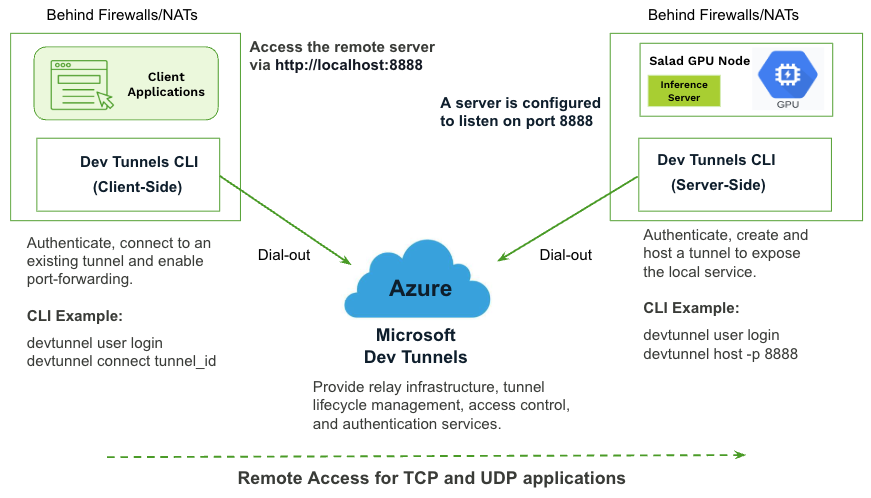
Dev Tunnels CLI
VS Code Remote - Tunnels
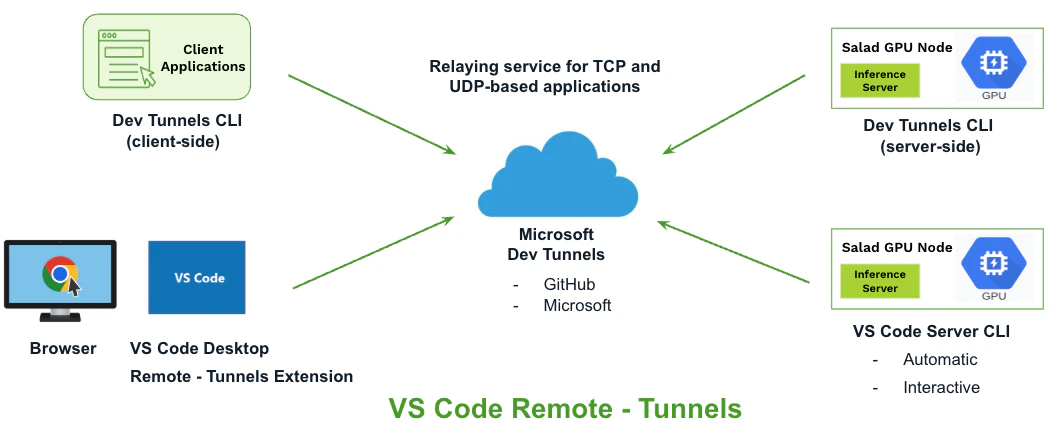
VS Code Remote - Tunnels is built on Microsoft Dev Tunnels to simplify remote development. It allows developers to connect to remote VS Code Servers (such as those running on SaladCloud) using the Remote - Tunnels extension in VS Code Desktop or a browser, without requiring direct network access between the local and remote environments. To enable access, the remote environment must launch the VS Code Server in tunnel mode — either by creating a new tunnel or using an existing one to expose it. This can be done by running the VS Code Server CLI (ideal for headless environments like Salad nodes) or by enabling the Remote Tunnel Access from an existing VS Code Desktop installation. Once the tunnel is active, developers can connect to the remote VS Code Server through it. Similar to Dev Tunnels, this solution requires a GitHub or Microsoft account, and all Dev Tunnels specifications and limitations still apply. For instance, each Salad node must have its own dedicated tunnel, but multiple clients — using either VS Code Desktop or a browser — can connect to the same node through that tunnel. There are two ways to use this solution on SaladCloud:- Automatic Mode – This mode supports only single-replica container group deployments on SaladCloud, and the container image must be modified to launch the VS Code Server using an existing tunnel. You can manually create a tunnel and generate an access token using the Dev Tunnels CLI, which requires interactive browser-based authentication and must be done outside of SaladCloud. Both the tunnel ID and access token can then be passed as environment variables to a single-replica container group on SaladCloud. Once the container starts — or after a node reallocation — the VS Code Server automatically starts and connects using the provided tunnel and token, without requiring any manual intervention at runtime.
- Interactive Mode – Non-intrusive, requiring no changes to the container image. You can access any running Salad node through the terminal in the SaladCloud Portal, then manually install and launch the VS Code Server in tunnel mode. This process requires interactive browser-based authentication, which can be completed on your developer laptop.
Automatic Mode
Prepare Your Container Image
Here is an example application that demonstrates how to enable the automatic mode for container images running on SaladCloud. The Dockerfile creates a containerized environment by using a base image, then installing essential utilities and required dependencies including the VS Code Server CLI. It also copies the required Python code and startup script into the image.Dockerfile
start.sh
--name parameter assigns a user-friendly name for the tunnel (uniquely associated with the Salad node), which is
used when connecting from a browser:
SALAD_MACHINE_ID is a unique identifier for each Salad node and is easily viewable in the SaladCloud Portal.
SALAD_CONTAINER_GROUP_ID is available through the SaladCloud APIs or SDKs, and can also be retrieved by running
env inside the terminal of a container instance or checking the container logs in the SaladCloud Portal. Currently,
all instances (or replicas) within a container group share the same hostname, which is set to the value of
SALAD_CONTAINER_GROUP_ID.
You can use either SALAD_MACHINE_ID or SALAD_CONTAINER_GROUP_ID as the value for the --name parameter.
- With
SALAD_MACHINE_ID, you can easily connect to a specific node from clients, as the ID is readily accessible from the SaladCloud Portal. - Using
SALAD_CONTAINER_GROUP_ID(as demonstrated in this example) helps avoid client-side reconfiguration — such as refreshing clients to reconnect automatically — after node reallocation or container group restarts, since the value remains consistent across instances launched at different time within the same container group.
Create a Tunnel and Generate Access Tokens
Let’s create a tunnel with an access token using the Dev Tunnels CLI:Dev Tunnels CLI
Deploy the Container Group
Now your can create a container group with the following parameters using the SaladCloud Portal. For deployment using SaladCloud APIs/SDKs, please refer to this link.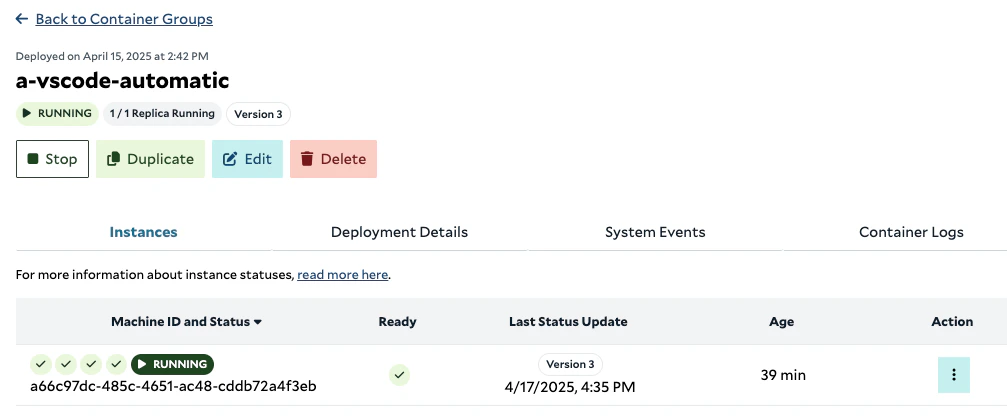
Connect to the Salad Node
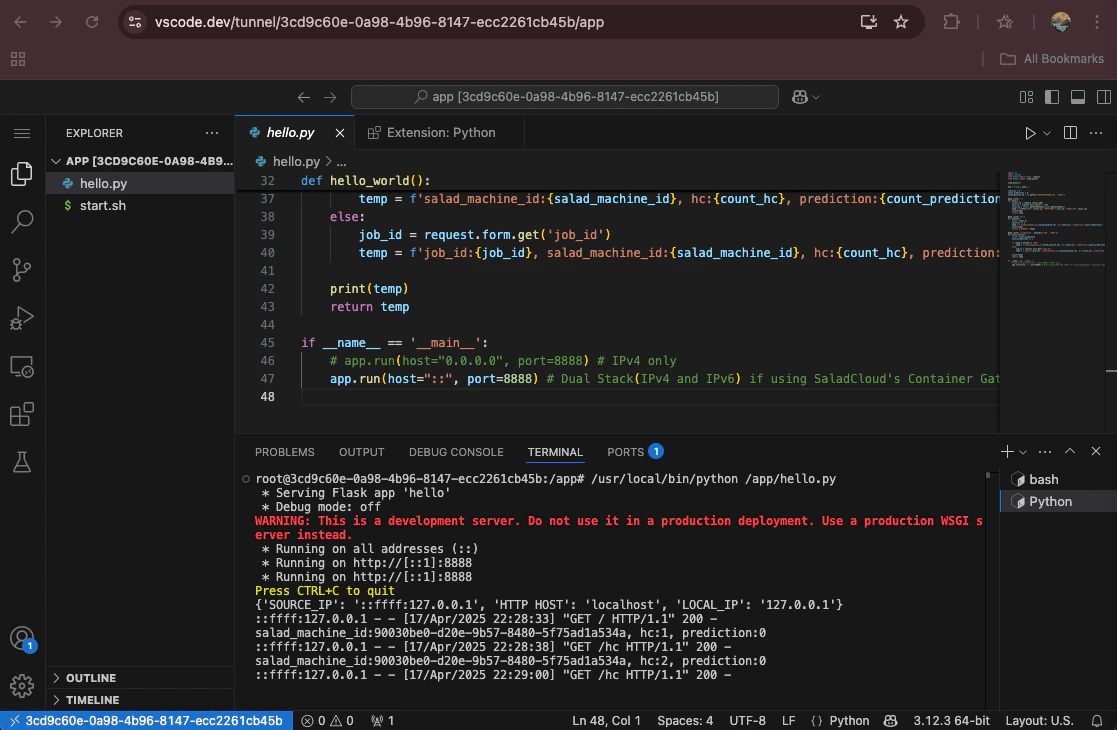
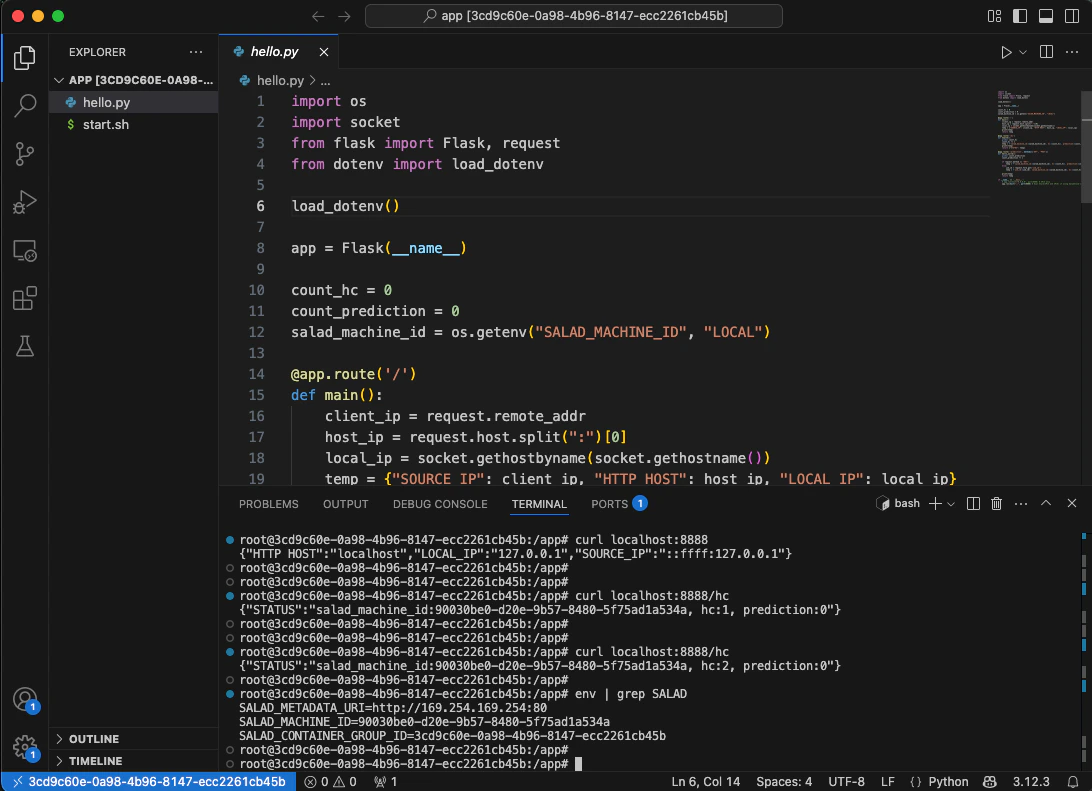
Once the instance is running, you can retrieve theSALAD_CONTAINER_GROUP_ID and connect to it using both VS Code
Desktop and a browser.
Perform a Check
Let’s check the tunnel using the Dev Tunnels CLI:Dev Tunnels CLI
Workflow Summary
The automatic mode may fit scenarios where you’re developing applications across various Salad GPU nodes over an extended period. The following summarizes the workflow:Interactive Mode
Launch the VS Code Server Interactively
To test or debug code in any running instance, open its terminal in the SaladCloud Portal. From there, you can manually install the VS Code Server CLI — or optionally include it in your container image during the build process — and start the VS Code Server in tunnel mode interactively.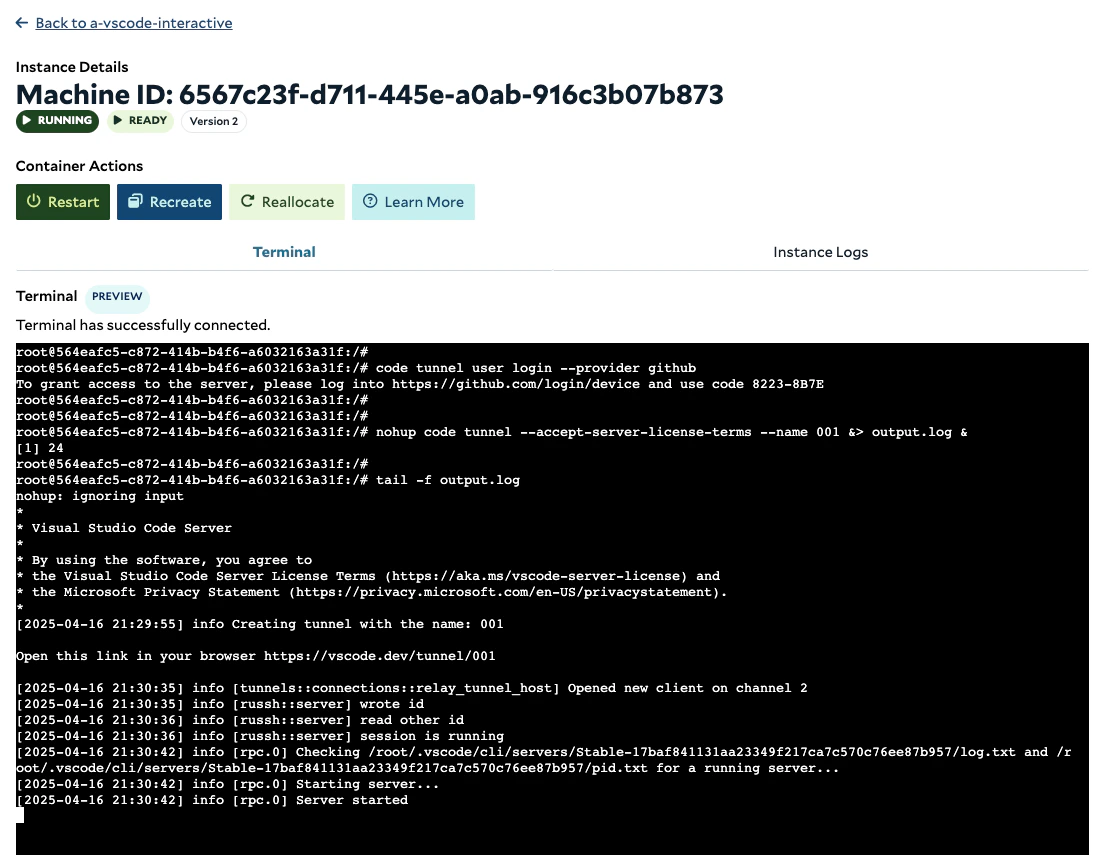
VS Code Server CLI
Perform a Check
The VS Code Server CLI interacts with the Dev Tunnels service under the hood for authentication and tunnel provisioning. You can check the tunnels created by the VS Code Server CLI using the Dev Tunnels CLI:Dev Tunnels CLI