| Container Image | Features |
|---|---|
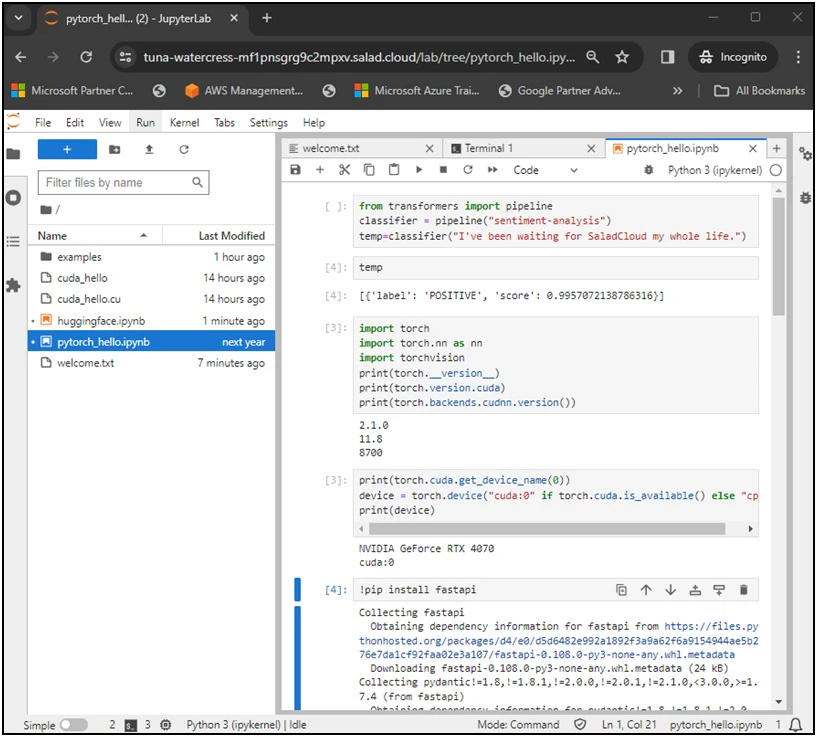
| saladtechnologies/jupyterlab:1.0.0-pytorch-tensorflow-cpu-aws-azure-gcp | JupyterLab; Hugging Face transformers and datasets; AutoAWQ 0.1.6; PyTorch 2.1 GPU; Python 3.10; CUDA 11.8 and cuDNN 8.7; Integration with AWS S3, Azure Storage Account and GCP Cloud Storage |
| saladtechnologies/jupyterlab:1.0.0-pytorch-gpu-aws-azure-gcp | JupyterLab; Hugging Face transformers and datasets; TensorFlow 2.13 GPU; Python 3.8; CUDA 11.2 (NVCC) and cuDNN 8.1; Integration with AWS S3, Azure Storage Account and GCP Cloud Storage |
| saladtechnologies/jupyterlab:1.0.0-tensorflow-gpu-aws-azure-gcp | JupyterLab; Hugging Face transformers and datasets; PyTorch 2.1 CPU; TensorFlow 2.15 CPU; Python 3.10; Integration with AWS S3, Azure Storage Account and GCP Cloud Storage |
The construction of the JupyterLab container images
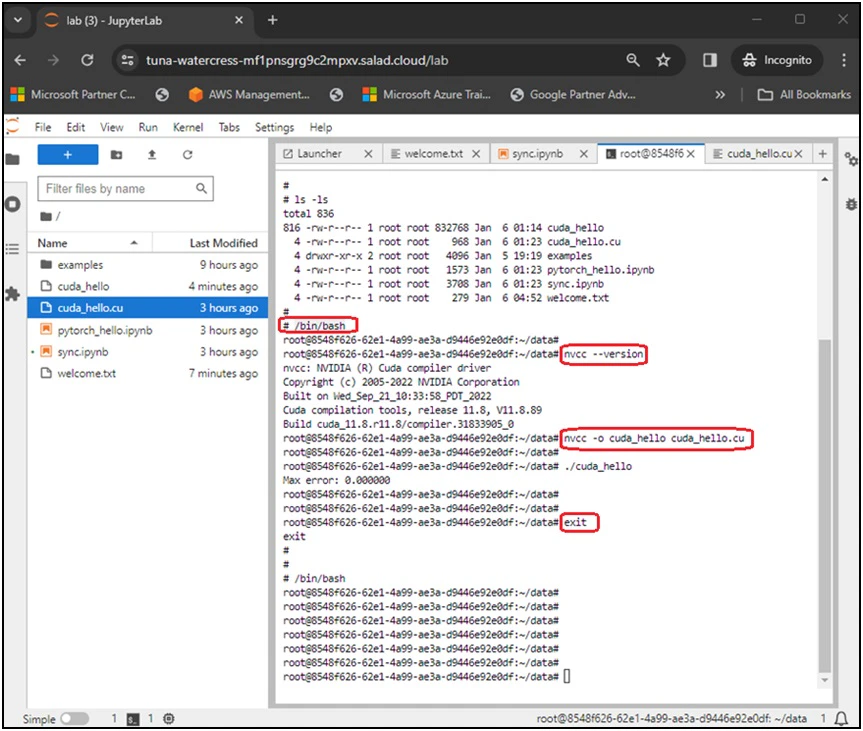
SaladCloud is designed to execute stateless container workloads. To ensure data persistence while using JupyterLab, we leverage storage services from public cloud platforms. The integration with major public cloud platforms, such as AWS, Azure, and GCP, is already implemented into the pre-built JupyterLab container images. Initial setup involves provisioning cloud storage in the chosen cloud platform, followed by using environment variables to pass the storage resource name and its access credentials to the container during launch. We create a folder named ‘data’ within the /root directory of the container, acting as the current working directory that needs the data persistence. During the initial launch of the instance, a script file named ‘start.sh’ is executed, and all data is synchronized from the chosen cloud platform to the /root/data directory by use of Cloud-specific CLIs, the storage resource name and access credentials. Following this, the script continuously monitors the /root/data directory, and any changes (create, delete or modify) in this directory or its subfolders trigger the synchronization back to the cloud.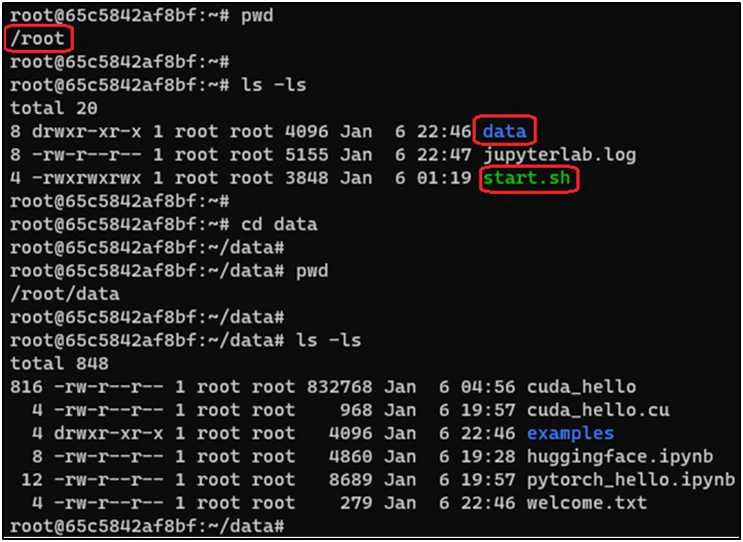
| Environment Variable | Description |
|---|---|
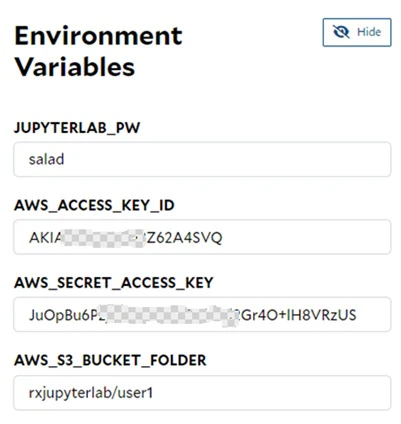
| JUPYTERLAB_PW | Define the password for JupyterLab. Can be omitted, and the default password is ‘data’. |
| AWS_S3_BUCKET_FOLDER; AWS_ACCESS_KEY_ID; AWS_SECRET_ACCESS_KEY | Provide the AWS-related info to access a folder within an AWS S3 bucket. |
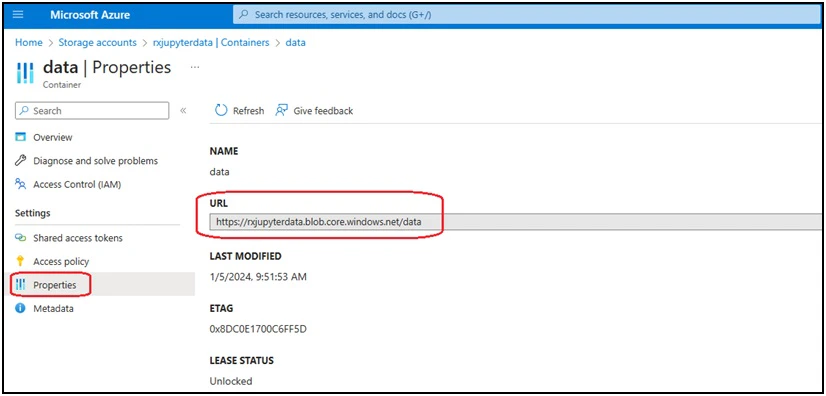
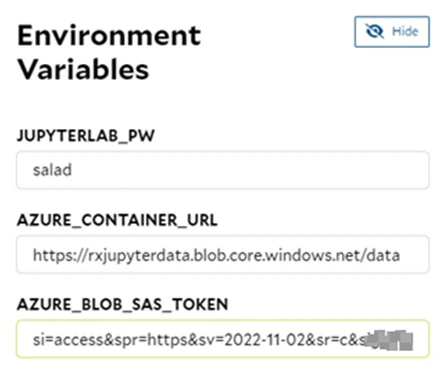
| AZURE_CONTAINER_URL; AZURE_BLOB_SAS_TOKEN | Provide the Azure-related info to access a container within an Azure storage account. |
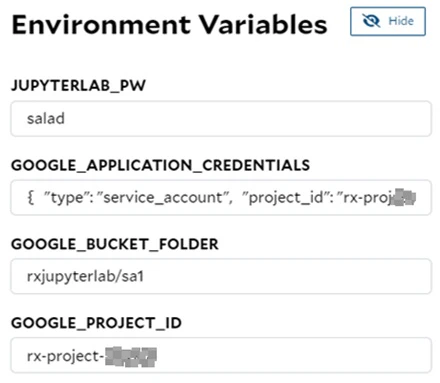
| GOOGLE_BUCKET_FOLDER; GOOGLE_APPLICATION_CREDENTIALS; GOOGLE_PROJECT_ID | Provide the GCP-related info to access a folder within a GCP Cloud Storage bucket. |
Provision the cloud storage in AWS
Step 1: Create an AWS S3 bucket and a folder inside the S3 bucket
Log into the AWS Console, and create an AWS S3 bucket (‘rxjupyterlab’) with the default settings in one of the AWS Regions, and create a folder named with an AWS IAM username (‘user1’) within the S3 bucket. This folder will be synchronized with the /root/data directory inside a JupyterLab container running on SaladCloud. If an organization is providing the JupyterLab service for numerous users and aims to ensure exclusive access to their own data, creating one folder per user within the same bucket is a recommended approach in AWS.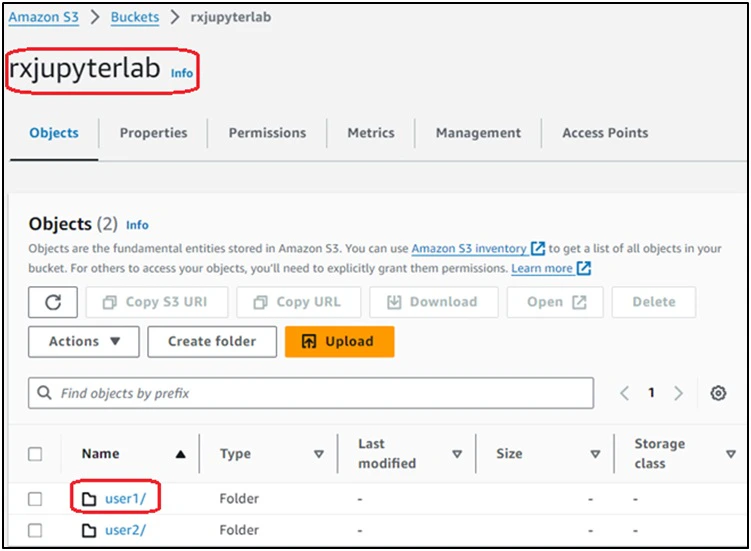
Step 2: Create an AWS IAM policy for exclusive access
Create an AWS IAM policy (‘access_its_own_folder’) using the provided JSON file. This policy will be attached to AWS IAM users, ensuring that each user can exclusively access their own folder in the same S3 bucket.
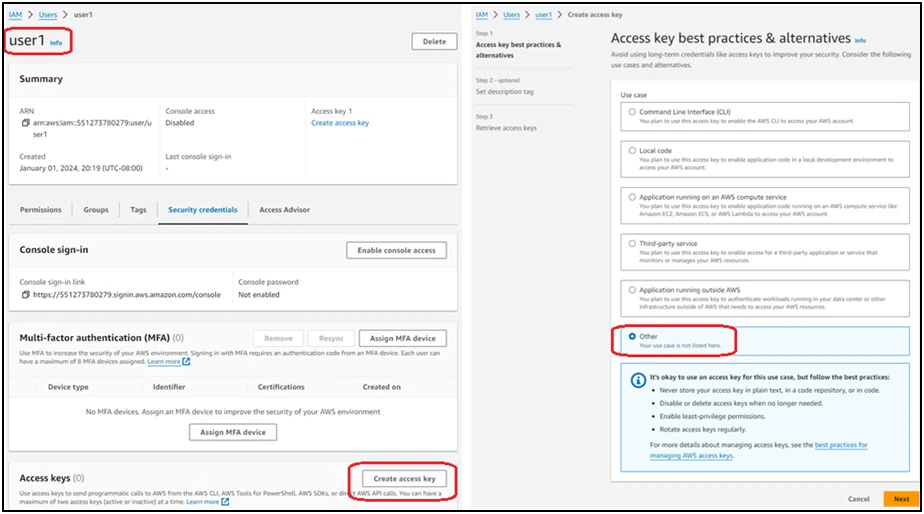
Step 3: Create an AWS IAM user and generate its credentials
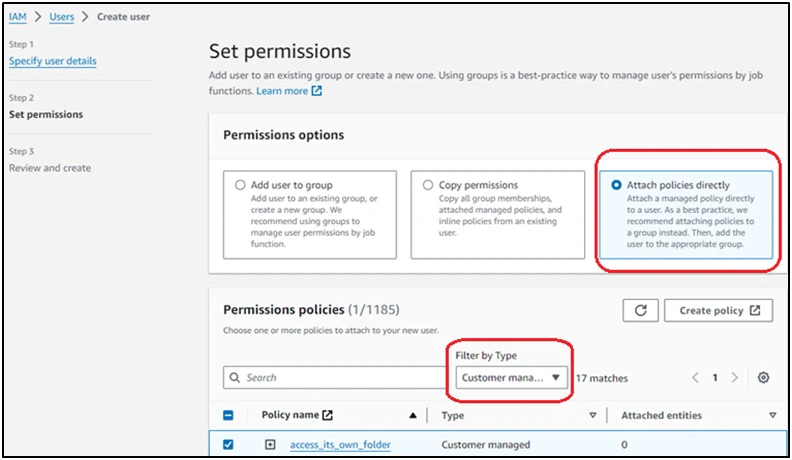
Create an AWS IAM user (‘user1’) without the AWS Console access and attach the customer-managed AWS IAM policy (‘access_its_own_folder’) to the user.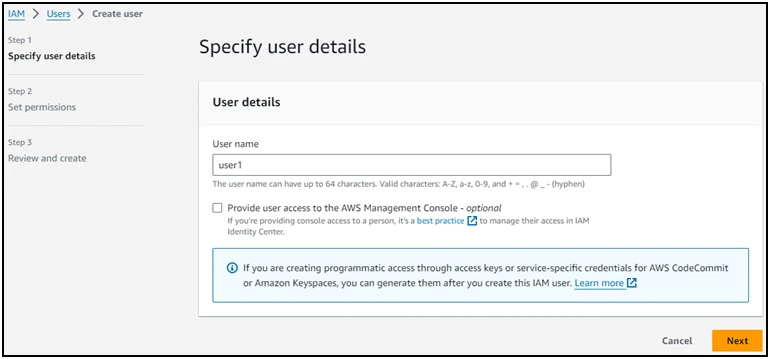
Provision the cloud storage in Azure
Step 1: Create an Azure storage account and a container inside the storage account
Log into the Azure Console, and create an Azure Storage Account (‘rxjupyterdata’) with the default settings in one of the Azure Regions, and create a container (‘data’) within the storage account. This container will be synchronized with the /root/data directory inside a JupyterLab container running on SaladCloud. If an organization is providing the JupyterLab service for numerous users and aims to ensure exclusive access to their own data, creating one container per user within the same storage account is a recommended approach in Azure.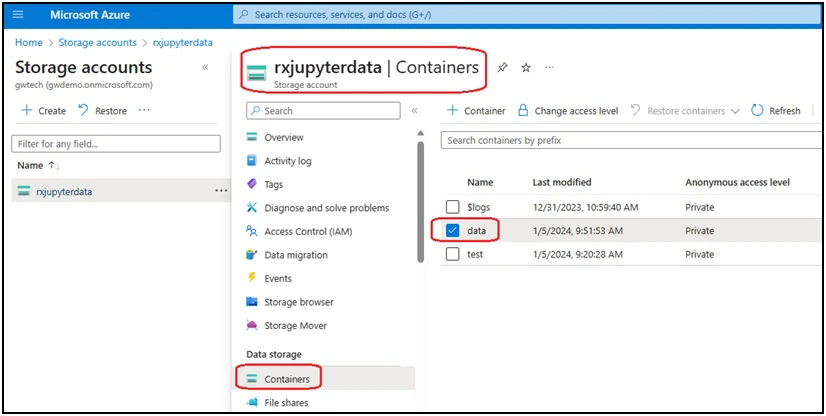
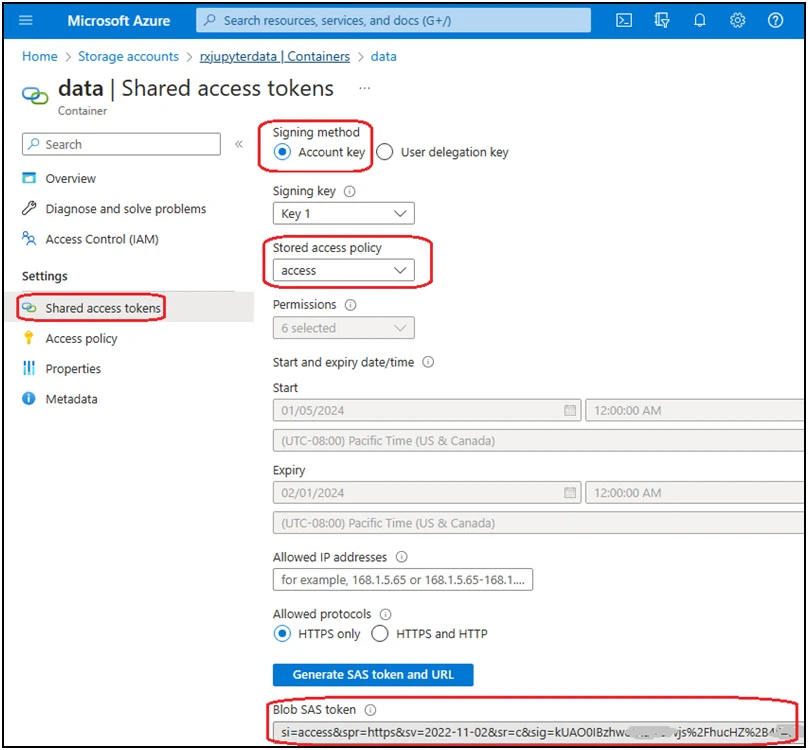
Step 2: Create an access policy and a shared access token for the Azure storage account container
For the access policy, you can define the start time, expiry time and permissions; all the 6 permissions are necessary for the data persistence of JupyterLab containers.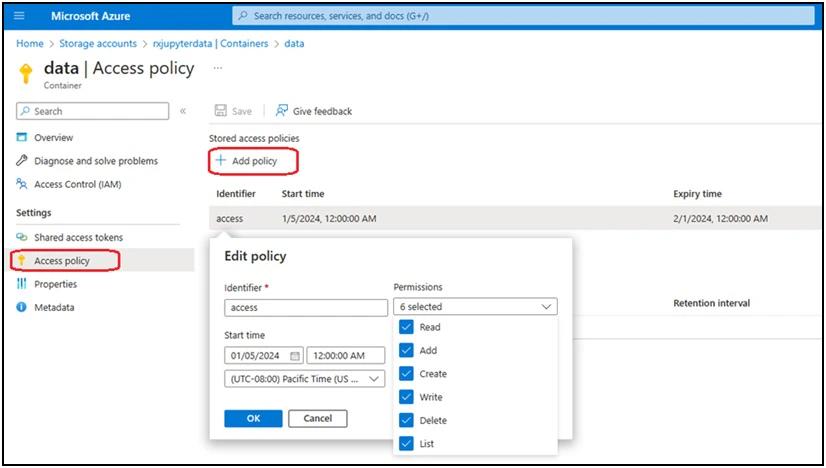
Provision the cloud storage in GCP
Step 1: Create a GCP cloud storage bucket and a folder in the bucket
Log into the GCP Console, and create a GCP Cloud Storage bucket (‘rxjupyterlab’) with the default settings in one of the GCP Regions, and create a folder (‘sa1’) within the bucket. This folder will be synchronized with the /root/data directory inside a JupyterLab container running on SaladCloud. If an organization is providing the JupyterLab service for numerous users and aims to ensure exclusive access to their own data, creating one bucket per user is a recommended approach in GCP.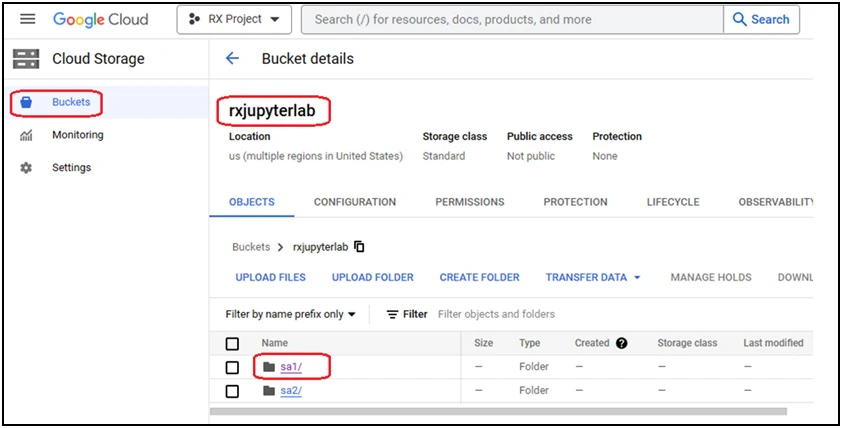
Step 2: Create a service account and generate its credentials
Create a service account (‘sa1’) without permissions, and add a key for the service account. Download the key’s JSON file and securely keep it in a safe location.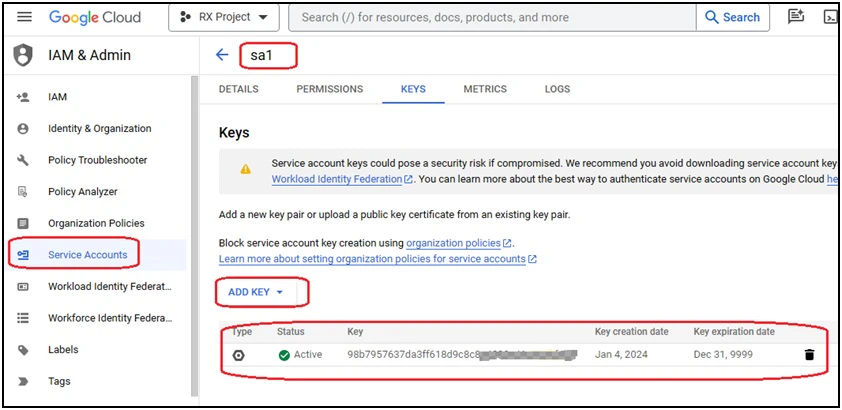
Step 3: Grant access to the bucket for the service account
Navigate to the “rxjupyterlab” bucket again and grant the “Storage Admin” role to the sa1 service account. Unlike AWS, GCP does not provide an easy way to grant access only to a specific folder inside the bucket. With the above role assignment, the sa1 service account will have access to the entire bucket.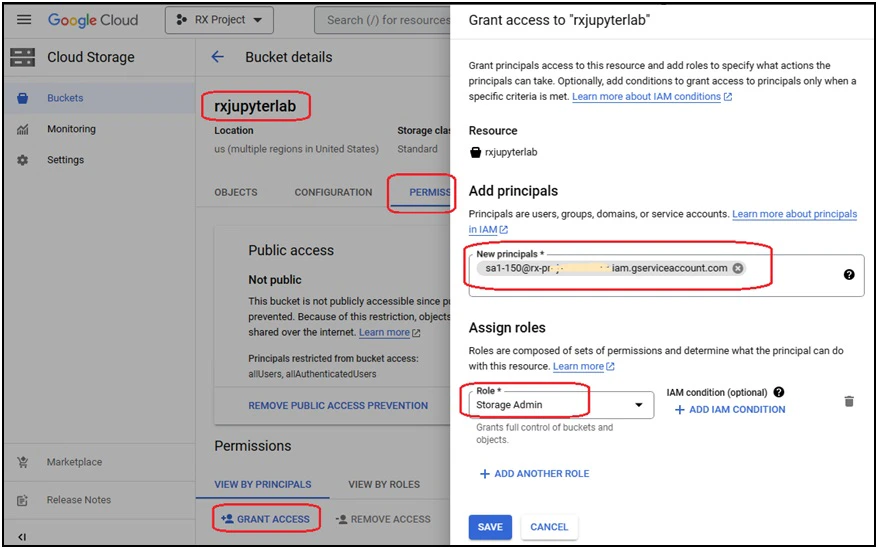
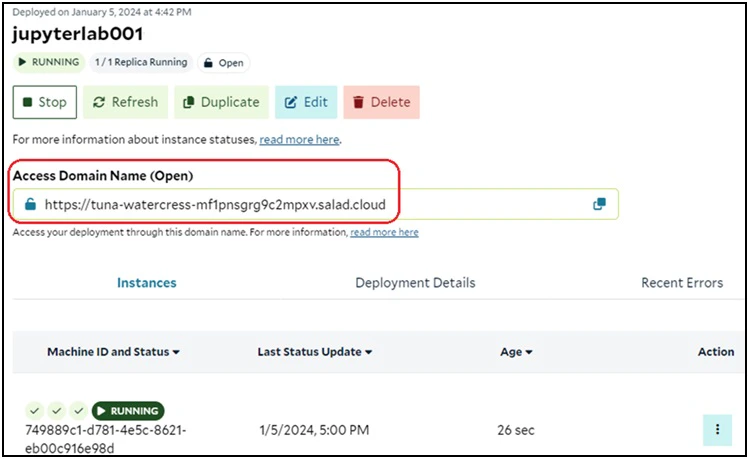
Run JupyterLab over SaladCloud
To run a JupyterLab instance on SaladCloud, you can log in the SaladCloud Console and deploy the JupyterLab instance by selecting ‘Deploy a Container Group’ with the following parameters:
| Parameter | Value |
|---|---|
| Container Group Name | jupyterlab001, or any name you prefer. |
| Image Source | saladtechnologies/jupyterlab:1.0.0-pytorch-tensorflow-cpu-aws-azure-gcp, or your tailored JupyterLab image. |
| Replica Count | 1, can only be 1. |
| vCPU | 2, based on the task need. |
| Memory | 4, Based on the task need. |
| GPU | RTX 1650 (4 GB), RTX 2080 (8 GB), RTX 3060 (12 GB) or others. You can choose multiple GPU types simultaneously, and SaladCloud will then select a node that matches one of the selected types. |
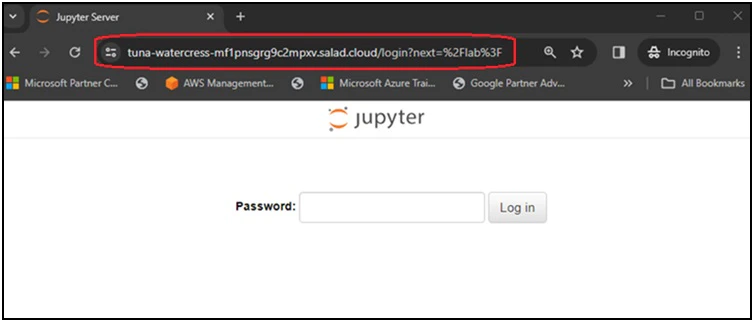
| Container Gateway | Enable, Port:8000, Use Authentication: No; and make sure the option “Limit each server to a single,active connection” is not selected. |
| Environment Variables | Provide the corresponding environment variables based on your needs. JupyterLab Password:JUPYTERLAB_PW; AWS:AWS_ACCESS_KEY_ID,AWS_SECRET_ACCESS_KEY,AWS_S3_BUCKET_FOLDER; Azure:AZURE_CONTAINER_URL,AZURE_BLOB_SAS_TOKEN; GCP:GOOGLE_APPLICATION_CREDENTIALS,GOOGLE_BUCKET_FOLDER,GOOGLE_PROJECT_ID |