> ## Documentation Index
> Fetch the complete documentation index at: https://docs.salad.com/llms.txt
> Use this file to discover all available pages before exploring further.
# YOLOv8 QuickStart Guide
*Last Updated: October 10, 2024*
## **Introduction**
Object detection has significantly evolved from its early days. Early systems struggled with shape differentiation, but
modern algorithms like YOLOv8 now pinpoint and track objects with impressive accuracy and speed.
YOLOv8 excels in processing live feeds, identifying and classifying objects efficiently. It provides real-time object
detection without requiring extensive model training from users.
Deploying YOLOv8 on SaladCloud is practical and efficient. SaladCloud's infrastructure makes YOLOv8 accessible, allowing
users to deploy advanced object detection systems without heavy hardware investment. Whether you're a developer or a
business, YOLOv8 on SaladCloud offers a scalable solution.
## **Deployment**
To deploy YOLO on Salad, you have several options:
**Option 1: Use our prebuilt container:**
* Create your account on [portal](https://portal.salad.com/) and set up your organization.
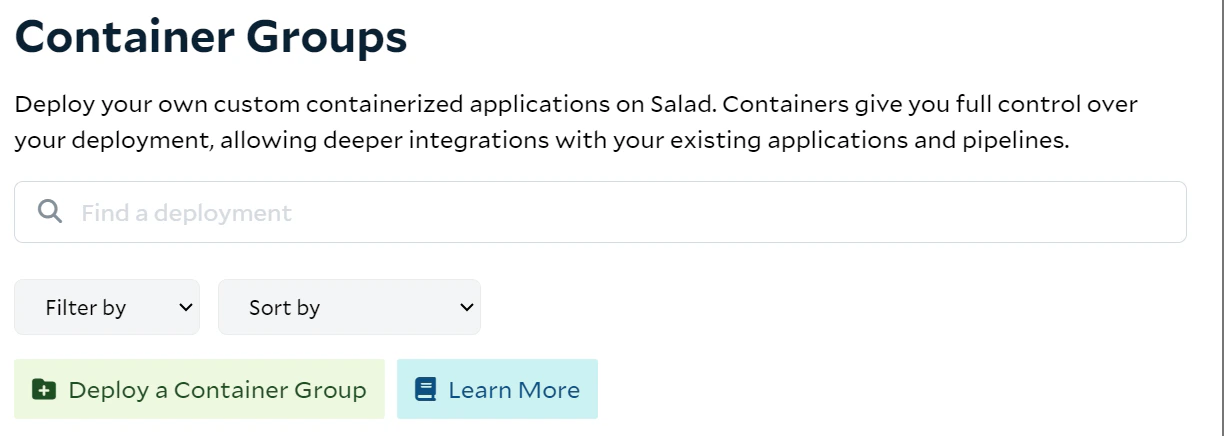
* Under container groups click “Deploy a Container Group“:
 **Configure Container Group:**
1. Create a **unique name** for your Container group
2. Click “edit” next to **Image source**. Under image name paste our open source image link:
saladtechnologies/yolov8-api:2.0.0 and click save
3. **Replica count**: Choose the number of replicas you need
4. **Choose compute resources**, including CPU, RAM, and GPU allocation.
5. **Optional Settings:**
* Enable health check probes, external logging, and environment variables as needed.
* For our solution, enable networking under **Container Gateway** by clicking “Edit,” checking “Enable Container
Gateway,” and **setting the port to 80**.
* Optionally, enable Authentication for an extra layer of security. If enabled, you'll need to provide your personal
token with API calls. Your token can be found here: [SaladCloud Portal](https://portal.salad.com/api-key)
6. Check “AutoStart container group once image is pulled” and hit “Deploy.”
**Option 2: Build your own image using our git repo.**
If you want to make some changes to the way the application works you can use our git repo as a base code:
1. Fork our Git repo: [SaladTechnologies/yolov8-on-salad](https://github.com/SaladTechnologies/yolov8-on-salad)
2. Make changes to the code. Example: To use your custom model save the model in “inference“ folder:
**Configure Container Group:**
1. Create a **unique name** for your Container group
2. Click “edit” next to **Image source**. Under image name paste our open source image link:
saladtechnologies/yolov8-api:2.0.0 and click save
3. **Replica count**: Choose the number of replicas you need
4. **Choose compute resources**, including CPU, RAM, and GPU allocation.
5. **Optional Settings:**
* Enable health check probes, external logging, and environment variables as needed.
* For our solution, enable networking under **Container Gateway** by clicking “Edit,” checking “Enable Container
Gateway,” and **setting the port to 80**.
* Optionally, enable Authentication for an extra layer of security. If enabled, you'll need to provide your personal
token with API calls. Your token can be found here: [SaladCloud Portal](https://portal.salad.com/api-key)
6. Check “AutoStart container group once image is pulled” and hit “Deploy.”
**Option 2: Build your own image using our git repo.**
If you want to make some changes to the way the application works you can use our git repo as a base code:
1. Fork our Git repo: [SaladTechnologies/yolov8-on-salad](https://github.com/SaladTechnologies/yolov8-on-salad)
2. Make changes to the code. Example: To use your custom model save the model in “inference“ folder:
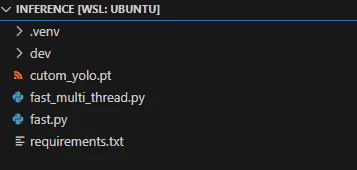 Replace model path in your fast.py file : model = YOLO("yolov8n.pt") with model = YOLO("path/to/your/model.pt") 3. Build
and deploy your image. Example Dockerfile is located in “Api” folder The repo also contains code for multithreading and
batch processing, as well as a Bicep file for Azure resources deployment. Azure is provided as an example. 4. Follow
steps from deployment option 1 above
**Option 3: Create your custom solution using our step-by-step guides.** We’ve created a detailed guide on how to set up
our solution, including all the parameters used. You can find it here:
[Deployment Guide](/container-engine/tutorials/computer-vision/yolov8-deployment-tutorial).
Replace model path in your fast.py file : model = YOLO("yolov8n.pt") with model = YOLO("path/to/your/model.pt") 3. Build
and deploy your image. Example Dockerfile is located in “Api” folder The repo also contains code for multithreading and
batch processing, as well as a Bicep file for Azure resources deployment. Azure is provided as an example. 4. Follow
steps from deployment option 1 above
**Option 3: Create your custom solution using our step-by-step guides.** We’ve created a detailed guide on how to set up
our solution, including all the parameters used. You can find it here:
[Deployment Guide](/container-engine/tutorials/computer-vision/yolov8-deployment-tutorial).